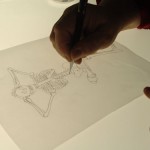

With the basic scene hand-drawn by her mother, Mica can now get to work on turning it into vector art. The original images get scanned into the computer, then Mica converts the lines into vectors (by hand and with a mouse – a painfully long procedure). Where traditional computer graphics represent images as pixels (raster graphics), vector-based graphics rely on primitive shapes and mathematical equations to display images. Basically, that means that as you zoom in on an image, it doesn’t start to look blocky and pixelated – it always stays smooth. Since we don’t know the exact size of this inlay yet, we will be able to scale the images up or down to get just the right size, and the artwork will always look smooth.
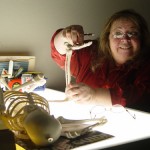
The other thing that needs to happen during this process is line thinning. Susan draws with (I believe) a .3mm drafting pencil, but that line is still thicker than the actual saw blades that will be used to cut the various materials. Once the drawing is turned into vector graphics, Mica can thin the lines to create an ultra-precise guide for the cutting process.
This picture shows the vectoring process very early on. The only parts that were converted so far are the skeleton’s right-lower rib cage and some of the arm lines.
Also note that the shirt is missing. In order for the shirt to lay in a realistic manner, Susan drew an entire skeleton, then layered the shirt on top of it. All of those bones will be covered in the final product, but this is a great example of the extremely high level of detail and amount of work that goes in to a project like this.
Mica says she spends about 15 minutes per day on skeletons, about all she can stomach. Once this painstaking process is complete, she will do a materials mock-up, which will approximate color and texture.