Birth certificate (long form).

Diamond-Eyed Jack Build Record

Diamond-Eyed Jack Build Record

The build record/warranty card has finally arrived!  Every new Alembic gets one, and it’s a great, concise description of the guitar.  My favorite part, though, is the complete list of artisans and office personnel who had a role in creating Diamond-Eyed Jack.  The raised seal in the lower-left corner certifies this as an authentic document.  It may seem insignificant next to the guitar itself, but I’m really happy to have this.

In other news, I noticed yesterday that Alembic has updated their Further product page to include Diamond-Eyed Jack as an outstanding example of this model.  You can see the page HERE.  The product page details the standard Further model specifications (many of which don’t apply to DEJ), examples of interesting and beautiful custom wood recipes, and a few Featured Customs.  I encourage you to check them all out.

That’s a fine surprise to stumble across!

One for the vault.

Headstock logo - inlaid sterling silver, Mother of Pearl, and Paua shell.

Headstock logo – inlaid sterling silver, Mother of Pearl, and Paua shell.

After an impressive 73 days as Alembic’s Featured Custom, Diamond-Eyed Jack’s feature page has settled into its final home – the Featured Custom Vault.

It has been such a thrill and honor to have my guitar welcome the many visitors of alembic.com.  With its move to the Vault, I have an extraordinary feeling of accomplishment as DEJ stands equal among the finest guitars Alembic (or dare I say anyone) has created.

Diamond-Eyed Jack is now part of Alembic’s long and storied history.  As a permanent resident of the Custom Vault, I hope it will inspire others on their own fantastic journey down the golden road.

The feature page is now located HERE.

To visit Alembic’s Featured Custom Archive, click HERE.  It’s worth the trip.

Thank you, Alembic!

All right, Mr. DeMille…

14241_wallpaperw0Happy New Year!  What have I been up to lately, you ask?  A lot… but as far as Diamond-Eyed Jack is concerned, let’s just say it has gotten QUITE the workout.  Its maiden voyage was to one of the great Williamsburg, Brooklyn recording studios, where it saw near-exclusive use on an (as of now) unofficial but exciting project.  It has also, not surprisingly, hogged all the stage time at a handful of shows, much to the delight of the locals.

There is, of course,  more significant news.  Today is Dad’s birthday – and so, another serendipitous date for this guitar presents itself.  Of all days, Alembic has chosen today to bestow upon Diamond-Eyed Jack the seriously rare honor of elevation to ‘Featured Custom’.  As you might have guessed, Alembic completes only a small number of guitars each year.  Out of those, a tiny fraction are selected to be a Featured Custom.  The Creators use this accolade to showcase best-of-the-best examples of their work.  Instruments with unique, one-of-a-kind build characteristics, ones of supreme beauty, or that have amazing stories attached to them are often favored here.  In the case of good ‘ol Diamond-Eyed Jack, all of the above apply.

As the Featured Custom, DEJ greets all visitors to alembic.com.  When its reign is over, Diamond-Eyed Jack will take its rightful place in the Custom Archive, among some of the most breathtaking and inspiring electric stringed instruments ever built.

By every conceivable metric, this is a truly stunning guitar.  I am so glad that Alembic feels the same, and am very proud to present it to you HERE.

So, Happy Birthday, Dad – this one’s for you.

Nothing left to do but smile, smile, smile.

I am happy.  As expected, Diamond-Eyed Jack arrived Friday afternoon!  It had been on the local UPS truck since 8:20 AM, but didn’t get to my house until 6:27 PM.  Opening that case for the first time, the long wait seems negligible, and certainly worth it.    It truly is the finest instrument I’ve ever had the privilege to play.  The feel, the sound, the build quality, the attention to detail – they have all surpassed my expectations (and those were quite high).  I’ve been spending the last few days making some fine adjustments to the string height and intonation, as well as just getting used to playing this exceptional guitar.

Among the many things the folks at Alembic excel at is listening to their customers.  They stayed true to my vision and intensions, and made fabulous suggestions along the way.  A great effort was made to ensure everything was just exactly perfect upon arrival.

I can never adequately thank them for building this masterpiece.  The best I can do is play it as best I can, and make sure they get plenty of pictures and recordings to remind them of our journey together.

The long journey to Nanuet may have come to an end, but this surely won’t be the last post to this blog.  I will be posting a detailed photo gallery (by the way, Jason – we need to do a photo shoot – soon), complete specifications, thoughts on the guitar as I get to know it better, and whatever else I feel might be interesting and pertinent.

This guitar is without question an appropriate and inspiring tribute to Dad.  It has all the right materials, quality, precision, and is a fine example of  the “doing things the right way” ethos he so valued.

Thank you for coming with me on this adventure.  I hope you all stay on the bus for a while… it’s going to be quite a trip!

Born under a *good* sign.

A wonderful day for a guitar to be born, indeed!  Alembic assigns all their guitars a “birthday” the day they leave their shop and begin the journey to their new homes.

Could it have been scripted any better that today is the day for mine?  Yes – on what would have been Jerry Garcia’s 70th birthday, Diamond-Eyed Jack is now on it’s way home.  It doesn’t get much better than that – it really doesn’t.

So here for the first time, is a picture of the COMPLETED guitar!  The gold-plated knobs, Ebony pickup selector cap, and black mini toggles are now in place.  Also, there are two custom made Coco Bolo MIDI scroll buttons, which look really smart.  If you look closely, you can see the beautiful custom Coco Bolo oval connector plate that houses the 13-pin Roland connector, and that the pickups are now housed in plain black casings.  Amazingly – but not surprisingly – a vision almost four years in the making is now a reality.

It has been 1,302 days since I first contacted Alembic about building my guitar.  I’m not one to buy into the idea of divine intervention, but If you would have told me that TODAY would be the day it would finally ship… well let’s just say I didn’t see that one coming.

1,302 is also the number of days between my birthday ( in 2009, the year I ordered my guitar) and December 21, 2012, the day the Mayan calendar ends, and all hell breaks loose.  More than likely just a coincidence, but just in case, I better get to playing this thing soon… got to be ready for that great gig in the sky!

Searching for the sound.

At long last, the electronics compliment is complete.  Ron had been tweaking the circuitry design until it met his exacting standards, which is the only way things leave his shop.  This picture shows the final design, attached to the Maple template.  Using a 1-to-1 guide like this allows Ron to ensure that all the electronics will actually fit inside the guitar, with the wires thoughtfully cut and routed for a neat, orderly presentation.

Later today, James will transplant these electronics into the guitar.  Once onboard, the knobs and buttons will be installed, and the entire system will be tested and calibrated.

Today is the day the guitar makes its first sound.

High strung.

These images are two of six I received while attending the Furthur concert in Brooklyn this past Friday.  As you can see, the guitar is basically done – pickups have been installed, the solid brass hardware has been mounted, and yes – we have strings!  There will be some small changes, though… Alembic installed pickup casings that have gold ‘ALEMBIC’ lettering on them, and I am swapping them out for black, unmarked casings.  Also, the black plastic pickup selector toggle cap will be replaced by a hand-cut piece of Ebony.

The only components that are missing outright are the Alembic electronics.  As of Friday night, Mica informed me that “Dad is still working away with the switching for the pickups, he’s trying to avoid adding another buffer to pull it off. He took a break this afternoon and will return to his bench this evening.”  I’ll be checking in with her later today to find out the status.  Either way, I think the electronics will be transplanted from the bench to the guitar sometime today.  Once that happens, the knobs, buttons, and switches will fill the holes on the front, and the guitar will be visually complete!

Fancy fretwork.

Alembic called yesterday with some great news!  Since I last spoke with them, the guitar has been in “final cure” – a resting period during which the top layer of finish is allowed to fully harden.  It also better prepares the wood for the rub out, which is going to happen today.  The wood finishing process must have gone smoothly.  I’ve heard stories of layers of finish having to be stripped away after imperfections (like dust, air bubbles, etc.) are found, greatly increasing the time it takes to get to the rub out stage.  The fact that the wood is ready to be rubbed out means the guitar has passed that crucial last inspection, and the finish has been deemed worthy in the eyes of the artisan.

During the rub out, any contaminants acquired during application of the final coat of finish are removed, and the final sheen of the instrument is determined.  In the case of my guitar, the entire instrument will have a high-gloss finish except for the neck, which will have a satin feel to it.

The first step in the rub out process, as I understand it, is to finely sand the entire instrument, which removes any surface dust or sputter spots from the spray gun.  From there, the instrument is repeatedly rubbed with sandpaper of increasingly high grit.  Steel wool and pumice can also be used.  The neck, getting a satin finish, will not be rubbed out to the same degree as the rest of the body.  The more progressively fine you go with the leveling material (sandpaper, etc.), the higher the gloss will be.  At some point the neck won’t receive any more treatment while the rest of the guitar continues to get shiny.

At the end of the process, the finish is hand buffed, to ensure a beautiful, even shine that will flawlessly showcase the wood and inlay work it protects.

Now while the rub out is happening, final preparations of the electronics are being made.  Last night, Ron and Tony were busy cutting, soldering, and wiring up the electronics package.  They use a dummy guitar body which exactly duplicates my custom control layout, so everything is cut to the proper length.  When the rub out is complete, the electronics will be removed from the dummy and placed in the real thing, and that should happen tomorrow or Monday.

I don’t have any pictures that show the guitar after the final cure yet, but I’m including this recent shot of the entire guitar.  You can see that the frets are on, the fingerboard inlays are done, and if you look closely, you can just make out the Alembic logo at the headstock.  This is the first picture I’ve gotten of the full guitar in a long time, and the first since the medallion was inlaid.  I can finally see everything in context.  It looks perfect.

All dressed up.

The guitar gods sure have been busy lately!  The custom inlays for the fingerboard are now in, and it has finally been fretted.  It looks like a guitar now!

The plan for the fingerboard was finalized about 15 months ago, after many months of design evolution.  From the start, I knew I wanted a simple, one-of-a-kind design, using just a few different, understated materials.  I insisted the fret markers stay away from the center of the fingerboard, and that we use an uncomplicated, repeating shape that would be unique to only this guitar.  Eventually, we came up with the scalloped wedge motif which runs up the low E string, then “switches lanes” to the high E at the 12th fret.  They’ve since been nicknamed “delta wings.”

Materials used:

  • Black Tahitian Mother of Pearl for all fret markers exclusive of the 12th and 24th.
  • White Mother of Pearl 12th fret markers.
  • Black Tahitian Mother of Pearl ‘CJ’ initials.
  • White Mother of Pearl 24th fret ‘D.E. Jack’ nameplate and tulip tip.

The nameplate is one giant piece of MOP, with lettering that is hand-cut all the way through.  A mixture of epoxy and ebony dust is used to fill in the letters.  Not only does it look awesome, it will survive many fingerboard sandings, if it ever becomes necessary.

It’s an incredible milestone that ALL the inlay work is now done.  Now the guitar goes back into spray, getting 1 coat of finish every 24 hours until it’s ready for the final rubout.  We’re sprinting to the finish line.

The story in your eyes.

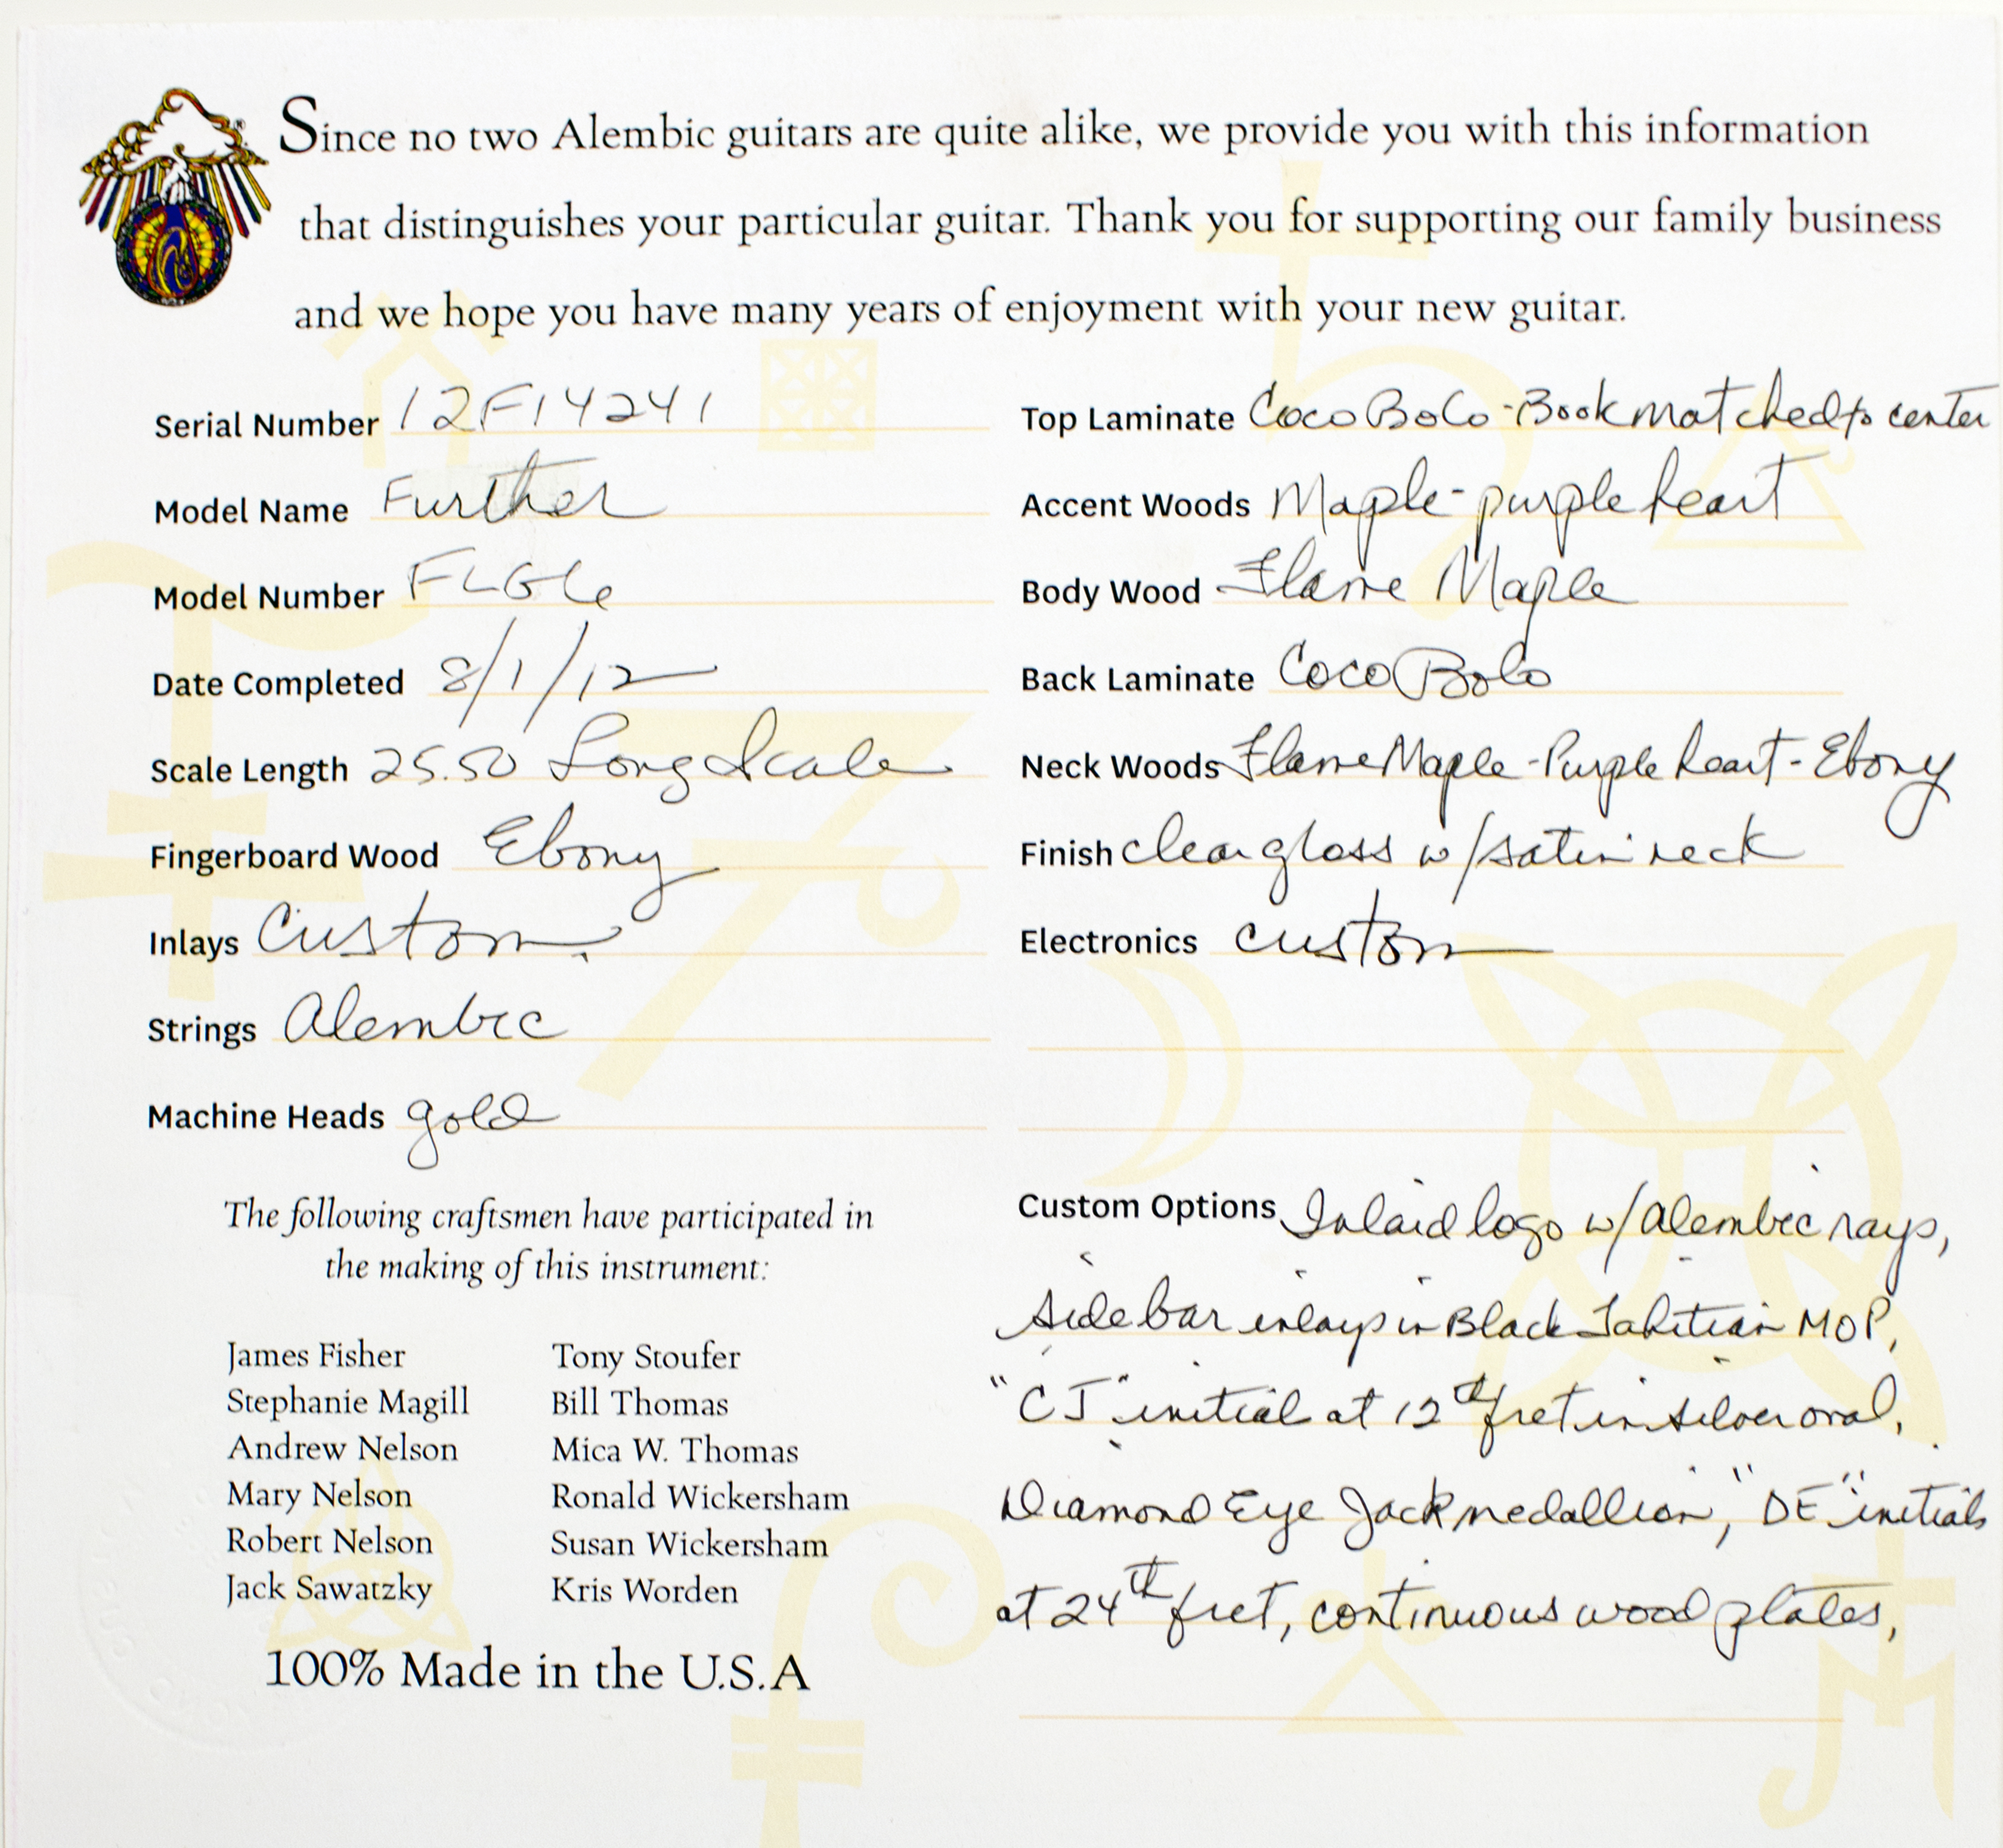
Today, I am proud to offer a very significant update to this journey.

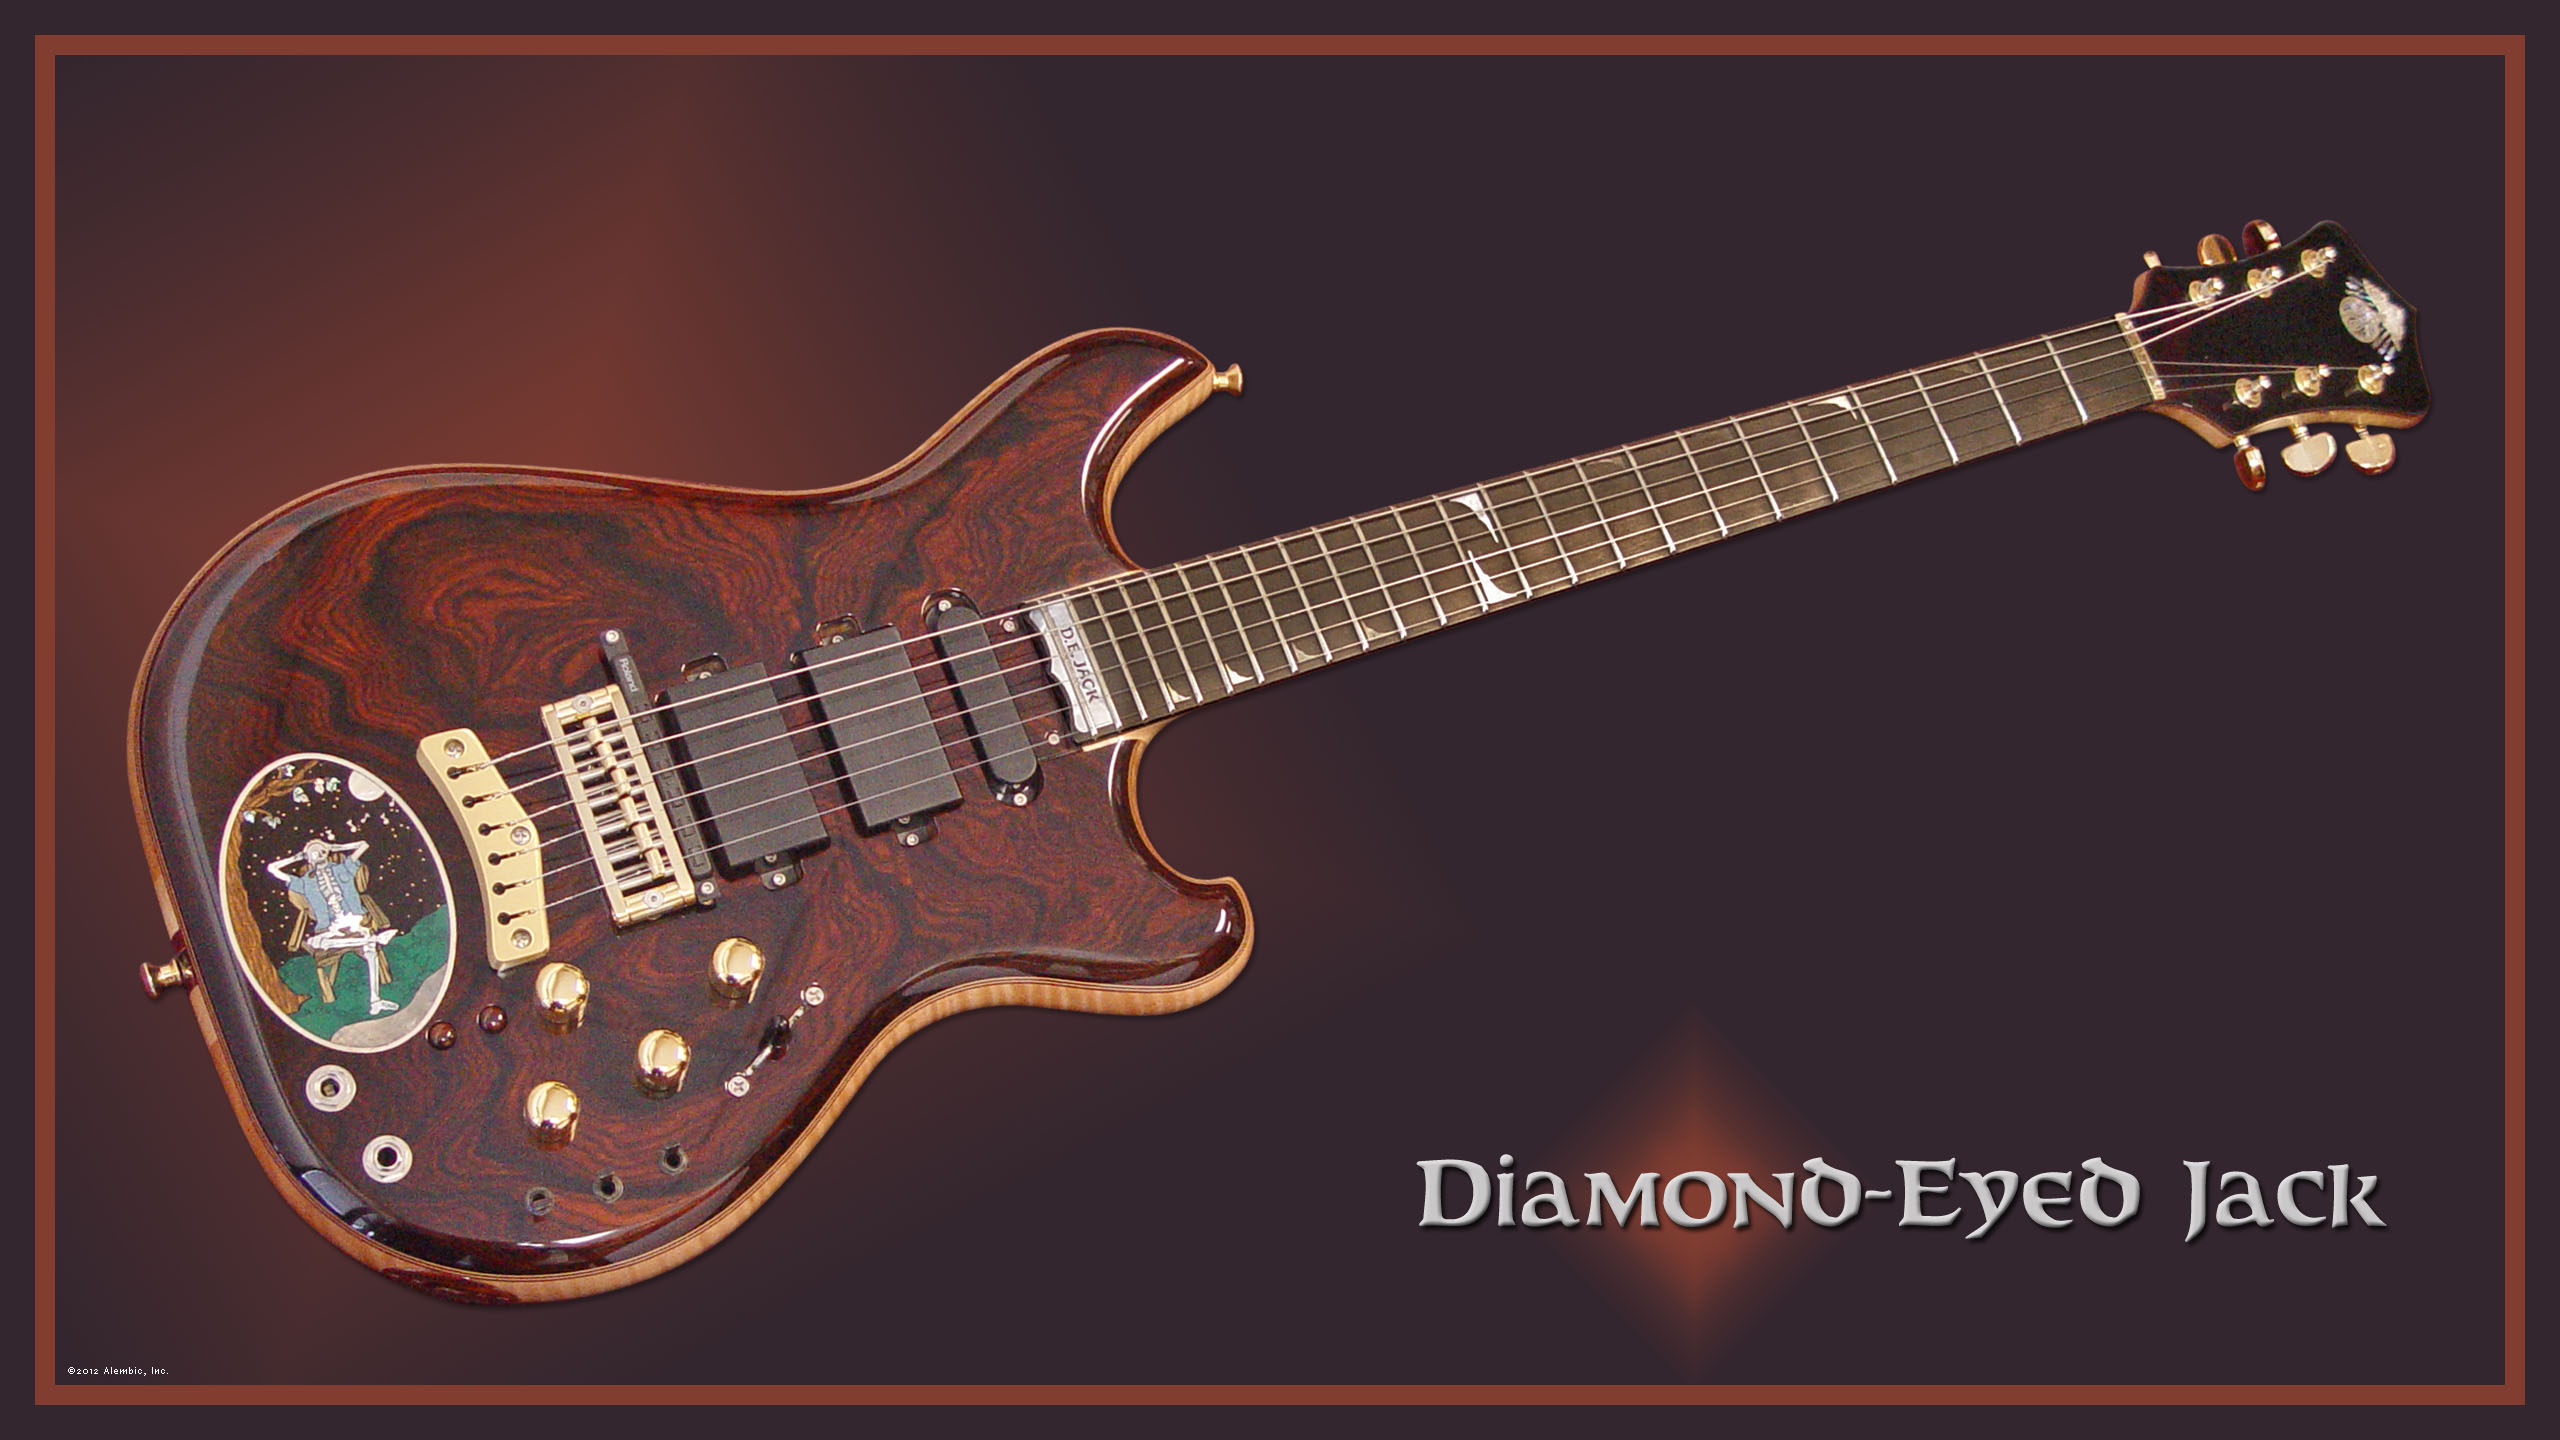
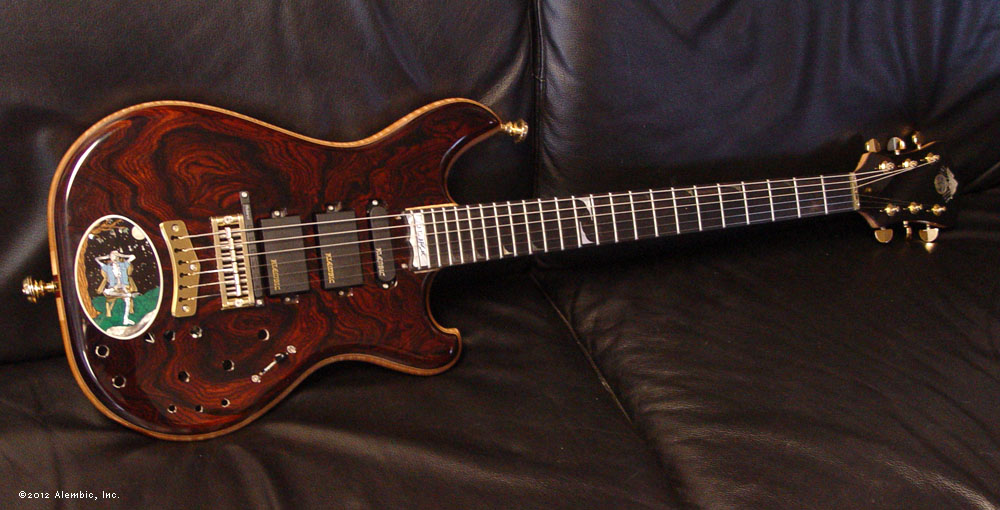
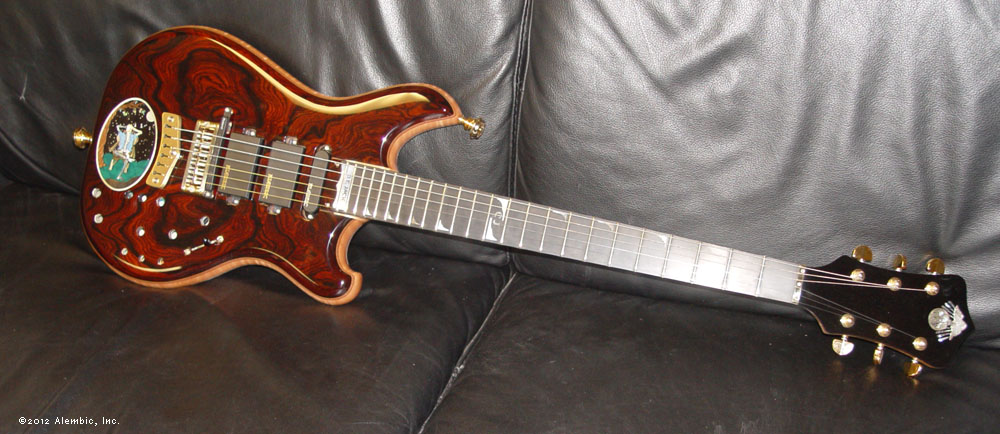
Alembic has spent months turning one final detail of my vision into reality.  That would be the beautiful diamond, now inlaid into Jack’s right eye… and now you know why the guitar is named Diamond-Eyed Jack!  (Yes, the actual lyric in ‘China Cat Sunflower’ is often quoted as “diamond-eye jack,” but Robert Hunter’s lyric book adds the ‘d’ to eye, so I’m going with that.)

Anyway…

An unbelievable amount of thought, preparation, and practice has gone into this one detail – so much so, that you could probably write a blog on just the eye alone.  In future postings, I will take you through some of the process – which has been fascinating, at times frustrating, but altogether necessary, and in the end, flawlessly executed.

Alembic had to create several material mockups, in order get the procedure down just right before they committed to drilling into the medallion.  They even went so far as to purchase some actual diamonds, because they were not convinced the cubic zirconia samples they had initially been using would accurately represent the luster and reflection a real diamond would provide.

They eventually discovered that they didn’t have an appropriate tool to make the cut.  After trying all sorts of cutting devices, they went out and purchased a specialized jeweler’s countersink.  It differs from a traditional countersink, in that it has something like 18 cutting edges instead of the much lower number usually found on its woodworking equivalent.  Also, the tip is especially sharp, whereas countersinks made for wood are generally dull by comparison at the point, since they are often used in conjunction with a traditional drill bit.

With the right tool for the job in hand, they set out to perform all sorts of tests – sinking diamonds flush with the surrounding material, mounting them proud of the surface, backlighting them with special low-power LEDs…  In the end, and with a unanimous decision, we opted for a flush-mount, non-lit diamond, adding just the right amount of twinkle to Jack’s eye.  It took many months to get there, but the methodical approach to every aspect of this critical detail has yielded undeniably stunning results.

It would be great if the story ended there, but that’s really just the set up.  Going out and purchasing the perfect diamond for this project would be easy enough, but wouldn’t it be extra special if the diamond itself had a deeper meaning?  Well in this case, it does.

At some point, my parents did a curious thing.  They took their wedding bands, and melted them down to make one ring.  In that ring, they set one large diamond and many tiny diamonds, sourced from my grandmother’s (on my mom’s side) wedding ring.  The new ring was decidedly masculine, and my father started wearing it all the time.  Within the family, we jokingly called it the ‘Star of Eichinger’.  Dad was not what anyone would call a jewelry freak, but for some reason, he was able to pull this one off.

I, on the other hand, cannot.  The ring, now in my trust, had been destined to sit quietly in a dark jewelry box, rarely seen.  I could not sentence such a piece of family history to that lonely fate, so from the very beginning of this project, it was my intention that Jack’s eye was going to ensure the ‘Star of Eichinger’ continued to be a part of our family’s story.

I brought the ring to our local jeweler, and, after a well-deserved steam cleaning, picked out the nicest of the small stones.  He knocked it out for me, and I promptly saw to it that the stone arrived safely in Santa Rosa.  It was important for Alembic to have the stone on hand early, because its size would determine the scale of the entire medallion.

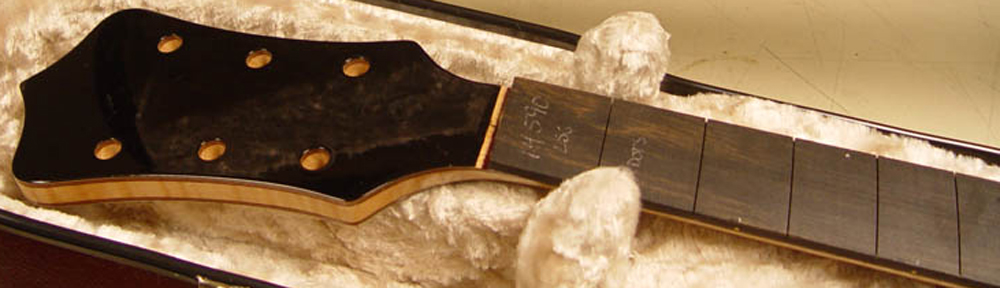
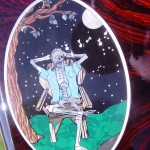
The diamond was finally set two days ago, and just yesterday, the entire medallion was inlaid into the body of the guitar.  You can now see the finished piece, elegantly bound in a ring of sterling silver.  The original design, if you recall, had smoke rising from the pipe, but the mockups just looked too busy – art is equally determined by what you leave out as it is by what you present.  The medallion has been covered in a coat of optically clear epoxy, allowing the instrument to continue through the finishing process.  During this process, the instrument is sprayed with sealer, allowed to dry, and then sanded.  This dance is repeated until there are enough layers of sealer to make the instrument smooth to the touch, and adequate protection is provided.

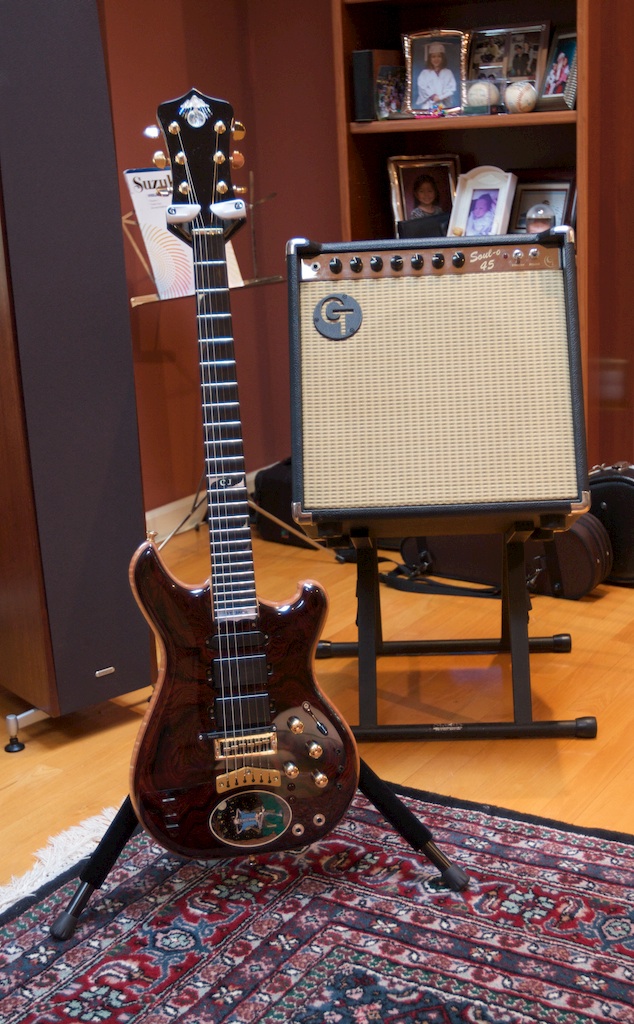
It really will not be long now before it’s done.